Monday, September 26, 2011

Angel Fluff Brownies.... That aren't fluffy?

I debated a long time before I decided to post this recipe. Basically, it didn't come out well at all. In fact, these brownies tasted pretty awful. Finally, I decided that I already post enough of my screw ups, why not post this one as well?

I really want to know if this recipe comes out better for someone else. I mean, just from the title these sound so good. I expected big chocolately pillows of goodness but I got bland, textureless bricks of sad.
Ingredients:
1 small package of instant chocolate pudding mix
2/3 cup sugar
1/2 cup flour
2 eggs (I used the equivalent in egg substitute. Could this be my mistake?)
1/3 cup butter or margarine, melted
1/4 cup whipping cream
1 teaspoon vanilla extract
1/2 cup chopped walnuts, toasted
Powdered sugar
Begin by toasting the walnuts. Spread them in a single layer on a baking sheet and bake at about 350 degrees for about five minutes or until darkened.
  Stir together first 8 ingredients in a mixing bowl until well blended. This batter is really, really thick so get those muscles ready.
Spoon batter into a lightly greased 8 or 9 inch square baking pan.
Bake at 350 for 25 minutes or until edges pull away from edge of pan. Cool in pan on a wire rack.
Sprinkle with powdered sugar if desired.
Look how sad these little squares look.
As you can see, these really didn't rise at all. If anything should make a person blissful, it's a brownie. These were just major disappointment.

Please tell me if you have better luck! I'm dying to know how these brownies are supposed to taste.

Good luck,
Rosie

Recipe Source: Southern Living Annual Recipes 1999

Monday, September 19, 2011

Almond Tuiles and Cherry Ice Cream, Part the Second: The Ice Cream

Nothing marks the tail end of summer like a cold, delicious bowl of ice cream. I had never attempted making ice cream before but I thought it was going to be far more complicated than it turned out to be. Admittedly, I was stained head to toe with cherry juice for a few hours, but other than that it was a breeze to make.

Ingredients
2 cups sugar
1/4 cup all purpose flour
Dash of salt
3 cups milk
4 large eggs
3 cups pitted fresh cherries
3 cups whipping cream
1 teaspoon almond extract

 Begin by pitting your cherries. I didn't have a cherry pitter so I was forced to resort to drastic measures-- namely the sharp end of a vegetable peeler. It worked fairly well, though it left me covered in juice.
Stir together the sugar, flour and salt in a heavy saucepan; gradually whisk in milk until smooth. Cook over medium heat, whisking constantly, 8 minutes or until slightly thickened.
Beat eggs until thick and pale.Whisk about one fourth of hot mixture into eggs; add to remaining hot mixture, whisking constantly. Cook, stirring constantly for 1 minute. Cool.
Pulse half of cherries in a food processor until finely chopped; remove. Pulse remaining cherries until coarsely chopped. Stir cherries, whipping cream and almond extract into custard.
Pour mixture into freezer container of a 1 gallon freezer.
Freeze according to manufacturers instructions. Pack freezer with additional ice and rock salt and let stand 1 hour before serving.
Isn't it beautiful? And don't think I've forgotten about the almond tuile. That's it on the side. I have to say, they're a pretty wicked combination. The ice cream is so rich and thick that it coats the tongue. The cookies are light and sweet. You can even make little ice cream sandwiches with them! This recipe was a hit with the fam and it made quite a bit. I would certainly suggest it for a summer party.
Yum!

Good luck,
Rosie

Source: Almond Tuiles- Grandma Rose
Ice cream: Southern Living Annual Recipes

Friday, September 16, 2011

Almond Tuiles and Cherry Ice Cream, Part the First: The Cookies

Forgive me, for this is going to be a strange and unsatisfying post. When I endeavored to make the tuiles and cherry ice cream, I didn't expect to make two separate posts and therefore did not plan my pictures accordingly. I just thought I would get that disclaimer out of the way and I hope you'll stick with me to the next most where you'll get the satisfaction of seeing the finished product.

When I decided to make Grandma Rose's almond tuiles, I had no idea what I was getting into. I had never eaten an almond tuile before. I hadn't even seen one! While making these, I was pretty much just thinking, "Oh, well. I guess this is right."
Ingredients
4 egg whites
Pinch of salt
2/3 cup sugar
4 tablespoons all purpose flour
6 tablespoons sweet butter, melted and cooled
1/2 teaspoon almond extract
1 cup chopped, blanched almonds.

If you're like me, you might have had the awful luck of not being able to find blanched almonds. Thus, here I give you the simple tutorial of how to blanch almonds all on your own.

Put the almonds in a bowl. Simple enough. Boil water in a small pot. When it comes to a rolling bowl, pour enough to just cover the almonds.
Let almonds soak for one minute and no longer.  Drain the almonds and rinse with cold water. Peel the skins off with your fingers. But seriously, just buy them blanched if you can. It will save you a ton of time.

Oh, and don't forget to chop them!
Now preheat your oven to 325 degrees. Butter a baking sheet. Beat the egg whites with salt until frothy.
Add sugar, one tablespoon at a time, beating constantly until mixture is stiff. Sift flour over the mixture, folding it in thoroughly but lightly.
Add butter mixed with almond extract and vanilla. Add almonds.
Fold in the butter mixture and almonds thoroughly but lightly. Drop by teaspoonfuls in mounds 3 inches apart on the baking sheet. Flatten each mound into a flat circle. Bake in center of oven for 10 minutes.


Here is where I screwed up, dear readers. I forgot to take a picture of me curving the cookies. >.<

Using a spatula, remove, one at a time, and curve each piece by pressing it around a rolling pin. Let cool on a wire rack.

I had a really hard time curving these cookies. For some reason, most of mine just wouldn't hold their shape. Maybe it's because my air conditioner broke one a 106 degree day, but I finally got so frustrated that I gave up and left the majority of them flat.

A helpful hint: If they start getting to hard to curve, place back in the oven for about a minute. This will soften them up again.

So what did they come out looking like? Well, you'll just have to wait until next time when I post the recipe for the cherry ice cream (or maybe I just forgot to take a picture of the cookies on their own).

Good luck and stay patient,
Rosie

Saturday, September 10, 2011

Sour Cream and Fresh Blueberry Cake with a Side of Don't Use Fiesta Bakeware

Let me get this off my chest now, before we proceed.

This cake didn't work out at all.

And yet, this is probably one of the best received recipes I've tried yet. Despite the fact that it was, ahem, underbaked, it was so delicious that it didn't even last an hour out of the oven. The batter might have been even better than the cake. I was afraid I wouldn't get it in the oven with the way my mom and I were spooning the batter out of the bowl.

But before I give you the recipe, let's talk a little bit about a brand of dishes- Fiestaware. I love Fiesta. I'm a sucker for colorful happy plates and Fiesta fits the bill. However, whatever you do, do not use their bakeware, I made a cake in a 13x9 Fiesta brand pan before and the middle didn't get done. I thought, hey, my fault. I must of undercooked it. And then it kept happening. This time was no exception. Something about the way the Fiesta pans cook makes the outside cook far faster than the center. You have the option of an underdone center or an overbaked outside. When it comes to bakeware, I highly suggest traditional metal or glass pans.

But now to the cake! This recipe is another from Grandma Rose. It's super moist and delicious. I think it would be perfect for a brunch, though it's tasty any time of the day!
Ingredients:
1/2 cup sweet butter, softened
1 cup granulated sugar
3 eggs
2 cups sifted all purpose flour
1/2 teaspoon salt
1 teaspoon baking powder
1 teaspoon baking soda
1 cup sour cream
1 teaspoon vanilla
2 cups blueberries
1/2 cup brown sugar

Begin by preheating your oven to 325 degrees. Cream butter and granulated sugar.

Add eggs, one at a time, beating well after each addition.
Sift dry ingredients and add gradually to the egg mixture alternately with sour cream, ending with the flour mixture.
Stir in the vanilla and 1 cup of the berries. I love this picture. Just look how plump and yummy those blueberries are.

Pour half of the batter into the pan.
Cover with remaining berries and sprinkle with brown sugar.

This is just so gorgeous! I wanted to dig in and not even bother baking the cake!

Add remaining batter and bake for 45 to 50 minutes.
This cake certainly looks done, does it not? It's beautiful. Browned but not burnt. A nice golden color.

Let cool in pan for 10 minutes. Remove to wire rack to finish cooking.
As you can see, this is where I realized what had happened. The center was not baked- AT ALL. When I dumped it out onto the rack, a little stuck and I noticed it was sticking. That was when the raw batter started leaking through the rack onto the table.

I was distraught. My beautiful blueberry cake was destroyed. I thought I was going to have to start all over. I was heartbroken.

Thank goodness for mothers. Mom calmed me down and said, "Y'know, with batter that good, I'm sure this will taste just fine." And believe it or not, it really did. My mom, dad, boyfriend and I all cut ourselves a piece and it was absolutely delicious. I even got a piece that was almost thoroughly baked.
 
So the next time I make this treat, I'm definitely going to use a metal pan. I know I'm going to have to make it again as my family has already been demanding it!

Good luck!
Rosie

Tuesday, September 6, 2011

Got the blues? Eat some peach dump cake!

Yesterday I left my home sweet home in Texas for the gray skies of Boston. It's back to school for me and, admittedly, I'm already feeling the blues. I miss my dogs, my family and my boyfriend. However, there is one thing so simple to make and so unforgettably delicious that it just blows all my homesickness away-- peach dump cake.
I worked at the local country club over the summer and that is where I found out about this amazing dessert. A caterer using the ballroom one day brought this for a party and gave me a bowl. Now to tell the truth, I don't like peaches at all. Nevertheless, I took a bite and, to my complete shock, I thought it was delicious! I knew that I just had to have the recipe. Thus, allow me to share this treasure trove of peachy goodness with you.

Ingredients:
1 large can or jar of peach slices in syrup (about 20-24 oz)
1-1 1/2 teaspoons cinnamon
1 box yellow cake mix, any brand
1 stick of butter
1 cup of brown sugar
1/2 cup of walnuts
Preheat oven to 350 degrees. Spread peaches into a 13x9 pan and chop into several smaller pieces. Make sure you don't leave out the syrup! That's part of what makes this so delish!
Sprinkle with cinnamon. Yum! This is already looking good!
Now take the box of cake mix and pour it over the peaches. Try to layer it pretty evenly. I broke up the large chunks you see here to avoid dry spots.
Butter time! Cut the stick of butter into several even slices. Place them across the top of the cake mix. Attempt to do this evenly but, as you can see, I failed miserably at this step and it still turned out just fine.
Now sprinkle a layer of brown sugar over this multi-layered wonder. This, in my opinion, is where the magic really happens.
Finally, top with the chopped walnuts. Place it in the oven and bake for 35-40 minutes. My oven runs a bit hot so mine took closer to 35. 

When it comes out, it should look like a glorious golden desert filled with rivers of molten wonderful.

OMG. I'm literally drooling right now.
Try to wait for it to cool. Or just dig right in, like I did. Give it the crowning glory of whipped cream or vanilla ice cream. It matters not which you choose as either will compliment this marvelous concoction just as well as the other.
I hope you enjoy this immensely. Some advice? Hide it from your family and friends or it will disappear... Fast!

Good luck!
Rosie

Source: The mystical and magical caterer at work

Thursday, September 1, 2011

Herp Derp Alert: The Seemingly Impossible Chocolate Pie

When I was a little girl, one of my favorite things in the world was my granny's chocolate pie. There was something special about that chocolate custard filling, topped by a generous dollop of Cool Whip, that I just have never really been able to recreate.

Granny always made things seem easy. She owned a local "gently used" consignment shop which kept me in the prettiest dresses during my entire childhood. I felt like a princess at every holiday in the dresses she gave to me and it made not one bit of difference if they were second hand or not. Thanksgivings and Christmases were held in her beautiful formal dining room where she made a table full of delicious foods. But the most delicious of all was that chocolate pie.

I attempted to make a chocolate custard pie several years ago and failed miserably. What I got was little more than chocolate syrup in a crust. But now, I attempted once more and though not nearly as pathetic as the last try, I still just couldn't seem to get it right.

Below is the recipe and the pictures of my work, but I hope you have much more success than I did.


Ingredients:

For the crust:
2 cups of crushed graham crackers
1/2 cup butter, melted
1/3 cup sugar

For the filling:
1 1/4 cups sugar
1/2 cup cocoa
1/4 teaspoon salt
3 cups milk
3 egg yolks
3 tablespoons margarine
1 1/2 teaspoons vanilla extract
The process begins easily enough. Start by mixing together all of your crust ingredients until they are well combined.
Press into the bottom and sides of a nine inch pie plate. Bake at 400 degrees for about 10 minutes or until it is lightly browned.
Now begins the hard part. In a heavy saucepan, combine the sugar, cocoa, cornstarch, and salt. Mix well to remove any lumps. 
Gradually add milk, stirring until blended.
 Cook over medium heat, stirring constantly, until mixture thickens and comes to a boil; boil one minute, stirring constantly. Remove mixture from heat.


NOTE: Be patient on this step! It takes a long time for a custard to thicken and you may be tempted to rush the process. Don't give in and just keep stirring. When it thickens, it will happen all of a sudden.

 Beat egg yolks until thick and lemon colored. Gradually stir about one-fourth of hot mixture into yolks.
Add yolk mixture to the remaining hot chocolate, stirring constantly. Cook over medium heat 2 minutes, stirring constantly (you'll soon be tired of hearing that phrase).


ALERT ALERT!! I'm pretty sure this is where I messed up. I cooked my chocolate for two minutes like the recipe said, but in retrospect I really believe it could have cooked longer. I have nothing that you can judge your mixture by, but make sure it is good and super thick before removing it from the heat.

Remove the pan from the heat; stir in margarine and vanilla. Immediately pour into the pie crust.

Looks pretty good, doesn't it? At this point, the recipe says to put meringue on top and put it in the oven to brown the meringue. But... yuck. I am not a fan of meringue and Granny never ruined a delicious chocolate pie with that eggy concoction. I'm not sure if that contributed to what happened next. My mom swears it shouldn't have but I may never know.

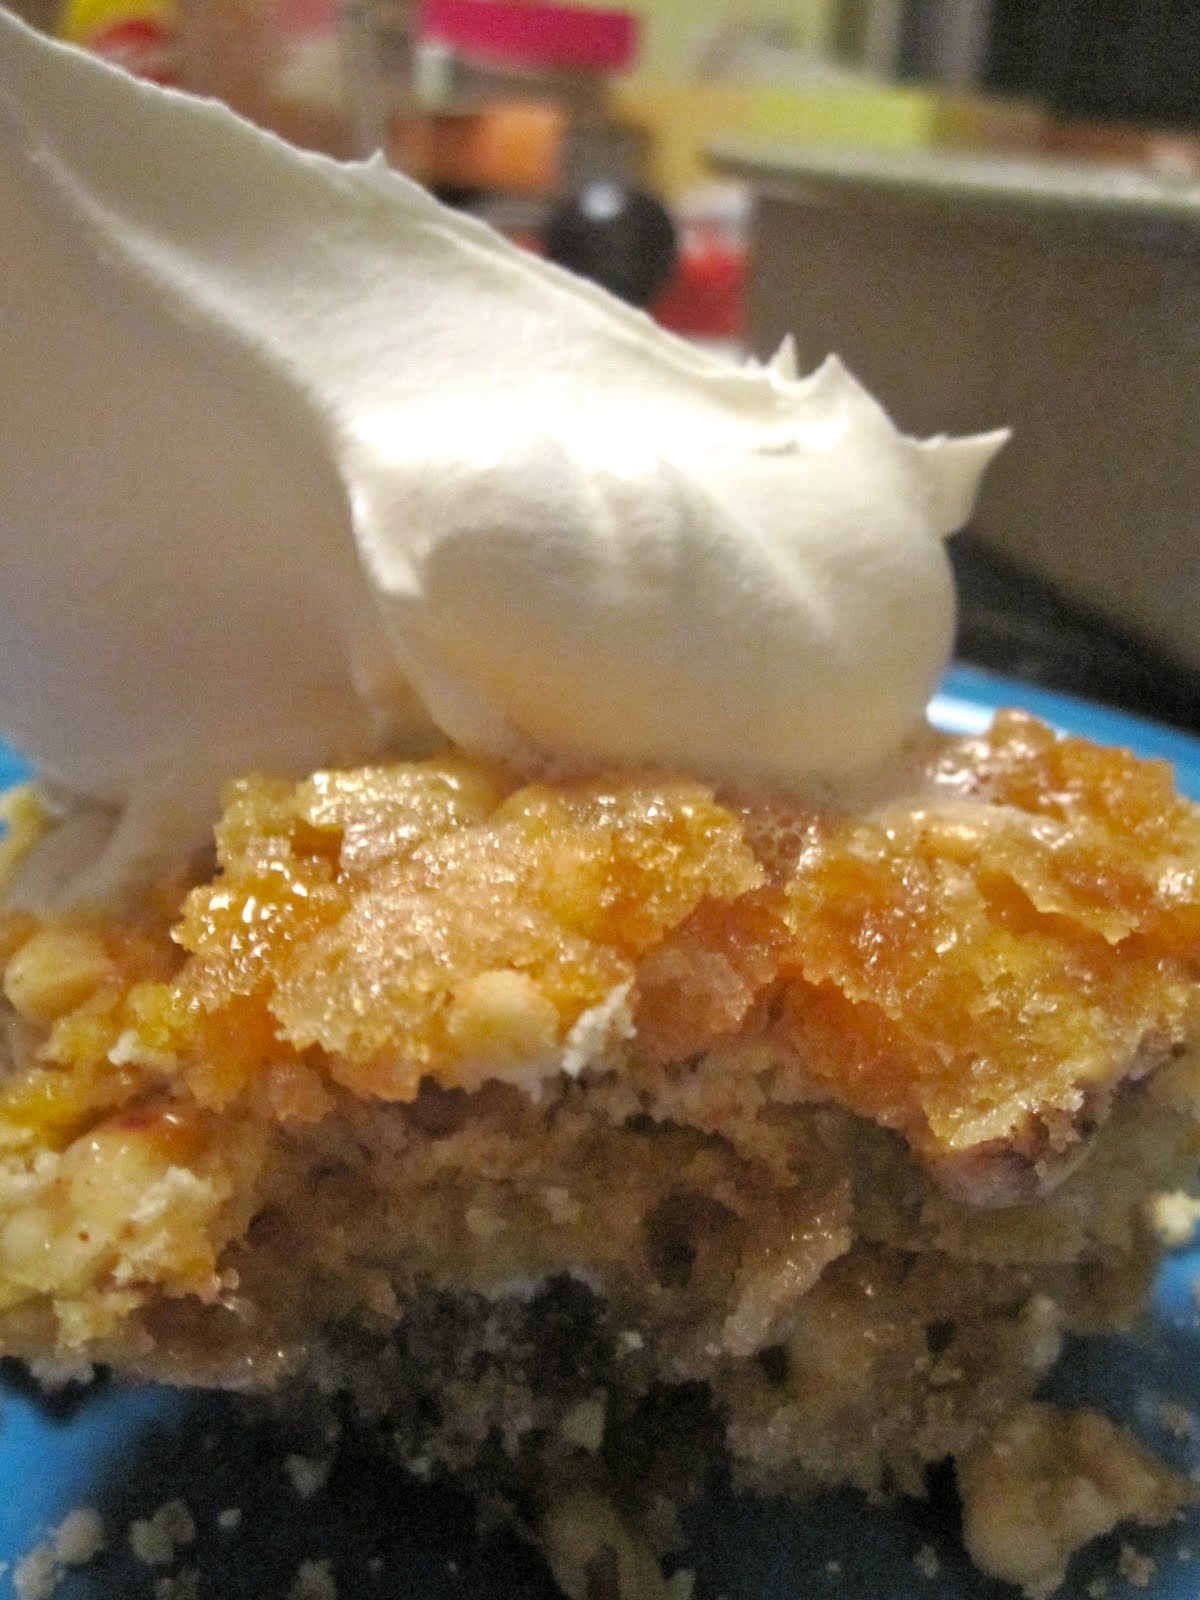
Let the pie cool before serving. I prefer to chill mine. That night, my parents, my boyfriend and I cut into the pie, chocolate lust in our eyes. I lifted a piece out and...
Voila?
Uh oh. That baby did not set nearly well enough. As soon as I tried scooping out a piece, it fell apart. Though definitely better that my original attempt, it seems that I have yet to master the art of getting a chocolate pie to set.
As you can probably tell, the center just oozed out like pudding. Not that I have anything against that-- I love pudding. And this tasted delicious. I just wish that I could produce one beautiful pie like my Granny used to make.

Granny now lives all the way in Lubbock. I haven't talked to her in years and I'm afraid I'll never be able to get her exact recipe for chocolate pie. It's crazy how time can fly by without you ever realizing that you're losing touch with the ones you love.

I hope you can learn from my mistakes and make a wonderful chocolate pie. If you do, share it with your grandkids one day. They'll thank you for it.

Good luck!
Rosie

Recipe source: Southern Living 1983 Annual Recipes