I know I've mentioned how much I love Martha Stewart recipes and how they have yet to let me down. I received her Cookies cookbook for Christmas and I realized that it has been far too long since I last made one of her recipes. So, I decided to bake some double chocolate coconut cookies.
What you need:
1 cup (2 sticks) unsalted butter, room temperature
1/2 cup granulated sugar
3/4 cup packed light brown sugar
2 large eggs
1 teaspoon pure vanilla extract
1 3/4 cups all purpose flour
1/4 cup unsweetened, Dutch-process cocoa powder
1 teaspoon baking soda
1/2 teaspoon baking powder
1/2 teaspoon coarse salt
2 cups white chocolate chunks
1 3/4 cups sweetened coconut flakes
1 3/4 cups coarsely chopped walnuts
Preheat your oven to 350 degrees. In a large mixing bowl, mix sugars and butter until smooth, about 2 minutes.
Mix in your eggs, one at a time. Stir in the vanilla.
Sift flour, cocoa powder, baking soda, baking powder and salt into a medium mixing bowl. Gradually mix into the butter mixture on low speed until well combined.
Stir in the coconut, walnuts and white chocolate. Make sure they are distributed throughout the batter evenly.
Using a 1 1/2 ice cream scoop, drop batter on a cookie sheet lined with parchment paper about two inches apart. Bake until set, about 10-12 minutes. Let cookies cool on sheets for about 2 minutes and then transfer with the parchment paper to a wire rack. Let cool completely.
These cookies are soooo good. I was worried that the ingredients would be overwhelming, but that wasn't the case at all.
I warn you, this recipe makes a lot of cookies. Try not to eat them all at one time!
Good luck and happy baking!
Rosie
Source: Martha Stewart
Showing posts with label chocolate. Show all posts
Sunday, May 27, 2012
Saturday, April 14, 2012
Oh Em Gee Nutella Cinnamon Rolls
I never thought about combining the rich, delicious taste of cinnamon rolls with the chocolately goodness of Nutella. But when I was scouring the vast plains of the internet for a suitable recipe for Nutella month, I knew I had to try these. This is going to be an amazingly simple post because we already know how to make the dough. We've done it before. In fact, it was the very first post on this blog. Now, with a few new steps, we're going to take those awesome cinnamon rolls in a whole new level of awesome.
What you need:
1 batch of cinnamon roll dough, prepared as in this post
1/3-1/2 cup of nutella (depends on what level of ooey gooey you're going for)
6 tablespoons butter
Cinnamon
3 cups powdered sugar
6 tablespoons milk
1/2 teaspoon vanilla
Prepare your dough and roll it out into a 12x9 inch rectangle. In a microwave safe bowl, add the nutella and butter. Microwave in 30 second increments, stirring after each one, until butter and nutella is mixed and smooth. Spread over the dough. Sprinkle cinnamon over the nutella filling.
Roll your dough into a 12 inch roll. Slice into eight pieces. Place into a round cake panned lined with parchment paper. Melt two tablespoons of butter and brush on top of the rolls.
Bake at 425 degrees for 20 to 25 minutes until the tops are golden brown. Dump the rolls out onto a greased wire rack.
Allow rolls to cool slightly. Meanwhile, in a medium bowl, whisk together milk, powdered sugar and vanilla. Glaze the still warm rolls.
Oh. Oh yeah. Look at that sexy roll.
Now that is delicious! These rolls were incredibly rich and wonderful. They're more of a dessert than a breakfast, but buttery rolls really balance out the nutella well.
Good luck and happy baking!
Rosie
What you need:
1 batch of cinnamon roll dough, prepared as in this post
1/3-1/2 cup of nutella (depends on what level of ooey gooey you're going for)
6 tablespoons butter
Cinnamon
3 cups powdered sugar
6 tablespoons milk
1/2 teaspoon vanilla
Prepare your dough and roll it out into a 12x9 inch rectangle. In a microwave safe bowl, add the nutella and butter. Microwave in 30 second increments, stirring after each one, until butter and nutella is mixed and smooth. Spread over the dough. Sprinkle cinnamon over the nutella filling.
Roll your dough into a 12 inch roll. Slice into eight pieces. Place into a round cake panned lined with parchment paper. Melt two tablespoons of butter and brush on top of the rolls.
Bake at 425 degrees for 20 to 25 minutes until the tops are golden brown. Dump the rolls out onto a greased wire rack.
Allow rolls to cool slightly. Meanwhile, in a medium bowl, whisk together milk, powdered sugar and vanilla. Glaze the still warm rolls.
Oh. Oh yeah. Look at that sexy roll.
Now that is delicious! These rolls were incredibly rich and wonderful. They're more of a dessert than a breakfast, but buttery rolls really balance out the nutella well.
Good luck and happy baking!
Rosie
Monday, March 26, 2012
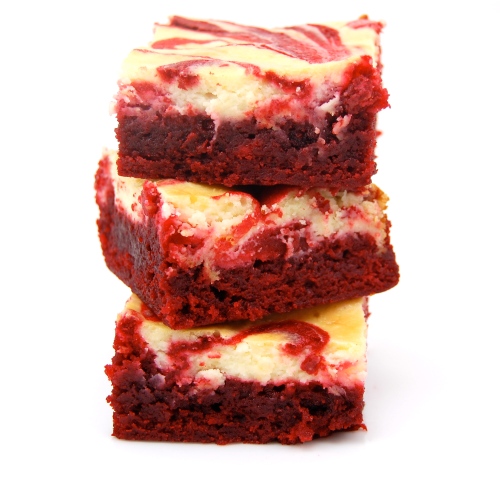
"Close Enough" Red Velvet Cheesecake Brownies
Sometimes things I bake don't come out quite right. And you know what? That's okay. It's frustrating but at some point I have to take it in stride and just enjoy treat, even if it's not perfect. That's what happened when I attempted to make these red velvet brownies. They came out pretty ugly but, did my family still eat and enjoy them? Indeed they did.
What you need:
1/2 cup butter
2 oz dark chocolate
1 cup sugar
2 large eggs
1 teaspoon vanilla extract
1 1/2 teaspoon red food coloring
2/3 cup all purpose flour
1/4 teaspoon salt
8 oz cream cheese, softened
1/2 teaspoon vanilla extract
Preheat oven to 350. Butter 8x8 square pan, line with parchment and butter parchment. In small, heatproof bowl, melt chocolate and butter together. Stir until combined and very smooth. Set aside to cool for a few minutes.
In a large bowl, whisk together the sugar, eggs, vanilla extract and food coloring.
Add chocolate mixture and stir until smooth. Add flour and salt and stir until just combined and no streaks of dry ingredients remain.
This is where my I'm going to veer from the directions I followed. Instead of spreading all of your batter, save about a third of it. Spread the rest in the bottom of your pan.
Prepare the cheesecake mixture. Beat cream cheese, sugar, egg and vanilla extract until smooth. Distribute eight dollops of chocolate batter. Using the brownie batter you set aside, spread over the cheesecake mixture. Now dollop the rest of the cheesecake batter on top of that. Using a butter knife, drag through the batter in order to swirl. Bake for 35- 40 minutes until edges are brown, cheesecake is set and a knife inserted comes out clean.
This is how my brownies looked.
This is how they looked on the recipe.
I really think that by following my modified directions, the brownies should actually turn out marbleized. However, I was significantly unimpressed even with the taste of these so I don't feel the desire to make another batch. They're a bit bland in my opinion and I think there are many better brownie recipes out there.
What you need:
1/2 cup butter
2 oz dark chocolate
1 cup sugar
2 large eggs
1 teaspoon vanilla extract
1 1/2 teaspoon red food coloring
2/3 cup all purpose flour
1/4 teaspoon salt
8 oz cream cheese, softened
1/2 teaspoon vanilla extract
Preheat oven to 350. Butter 8x8 square pan, line with parchment and butter parchment. In small, heatproof bowl, melt chocolate and butter together. Stir until combined and very smooth. Set aside to cool for a few minutes.
In a large bowl, whisk together the sugar, eggs, vanilla extract and food coloring.
Add chocolate mixture and stir until smooth. Add flour and salt and stir until just combined and no streaks of dry ingredients remain.
This is where my I'm going to veer from the directions I followed. Instead of spreading all of your batter, save about a third of it. Spread the rest in the bottom of your pan.
Prepare the cheesecake mixture. Beat cream cheese, sugar, egg and vanilla extract until smooth. Distribute eight dollops of chocolate batter. Using the brownie batter you set aside, spread over the cheesecake mixture. Now dollop the rest of the cheesecake batter on top of that. Using a butter knife, drag through the batter in order to swirl. Bake for 35- 40 minutes until edges are brown, cheesecake is set and a knife inserted comes out clean.
This is how my brownies looked.
This is how they looked on the recipe.
I really think that by following my modified directions, the brownies should actually turn out marbleized. However, I was significantly unimpressed even with the taste of these so I don't feel the desire to make another batch. They're a bit bland in my opinion and I think there are many better brownie recipes out there.
Sunday, March 11, 2012
Bye Bye Texas Coconut Swirl Brownies
Spring break has already come and gone. It went so fast I hardly even knew it was happening. It was great to see my family, my boyfriend and some of my friends. My best friend since middle school is actually leaving for the military this month and I'm not sure when we're going to see each other again. I have to say, she's probably the coolest person ever and I can't wait to show guys a little something we cooked up. Unfortunately, you'll have to wait until April for that little surprise. Sorry guys.
I did manage to get some baking done before I left. I had to make my nephew's birthday cake so it was a hectic time, but I also made some things just for fun. Including Martha Stewart's coconut swirl brownies.
What you need:
1/2 cup unsalted butter, cut up into small pieces, plus more for the pan
3/4 cup plus 1 tablespoon granulated sugar
1/3 cup sweetened condensed milk
2/3 cup unsweetened shredded coconut
1 large egg white
2 1/4 teaspoons vanilla extract
2 oz unsweetened chocolate, coarsely chopped
4 oz semisweet chocolate, coarsely chopped
2/3 cup all purpose flour
1/2 teaspoon baking powder
1/4 teaspoon coarse salt
3 large eggs
Preheat oven to 350 degrees. Butter an 8 inch square pan, line with parchment paper and then butter paper. Stir together 1 tablespoon sugar, sweetened condensed milk, coconut, egg white, and 1/4 teaspoon vanilla in small bowl.
Melt butter and chocolates in a double boiler. Let cool slightly. Meanwhile, whisk together flour, baking powder and salt in a large mixing bowl.
Whisk remaining 3/4 cup sugar into chocolate mixture. Add eggs, whisk until smooth. Stir in remaining two teaspoons of vanilla. Add flour mixture, stir until well combined.
Spread 1/3 of chocolate batter evenly in bottom of pan. Drop dollops of batter over the chocolate, about a tablespoon each.
Spread the remaining batter over the coconut then dollop any remaining coconut mixture over that. Using a butter knife, gently swirl coconut mixture into the batter by running the knife lengthwise and crosswise through the batter. Bake 35 to 40 minutes, or until toothpick comes out with a few crumbs, but not wet. Let cool in pan for 15 minutes and then lift onto wire rack to cool completely.
These brownies were pretty tasty, but they certainly were not my favorite. I'm a fudgey brownie kind of girl and these were definitely cakey. I would have liked to taste more coconut and I may add coconut extract the next time I make these. However, these are definitely better the next day as they get gooier. But who is that patient?
Good luck and happy baking!
Rosie
Source: Martha Stewart Cookies
I did manage to get some baking done before I left. I had to make my nephew's birthday cake so it was a hectic time, but I also made some things just for fun. Including Martha Stewart's coconut swirl brownies.
What you need:
1/2 cup unsalted butter, cut up into small pieces, plus more for the pan
3/4 cup plus 1 tablespoon granulated sugar
1/3 cup sweetened condensed milk
2/3 cup unsweetened shredded coconut
1 large egg white
2 1/4 teaspoons vanilla extract
2 oz unsweetened chocolate, coarsely chopped
4 oz semisweet chocolate, coarsely chopped
2/3 cup all purpose flour
1/2 teaspoon baking powder
1/4 teaspoon coarse salt
3 large eggs
Preheat oven to 350 degrees. Butter an 8 inch square pan, line with parchment paper and then butter paper. Stir together 1 tablespoon sugar, sweetened condensed milk, coconut, egg white, and 1/4 teaspoon vanilla in small bowl.
Melt butter and chocolates in a double boiler. Let cool slightly. Meanwhile, whisk together flour, baking powder and salt in a large mixing bowl.
Whisk remaining 3/4 cup sugar into chocolate mixture. Add eggs, whisk until smooth. Stir in remaining two teaspoons of vanilla. Add flour mixture, stir until well combined.
Spread 1/3 of chocolate batter evenly in bottom of pan. Drop dollops of batter over the chocolate, about a tablespoon each.
Spread the remaining batter over the coconut then dollop any remaining coconut mixture over that. Using a butter knife, gently swirl coconut mixture into the batter by running the knife lengthwise and crosswise through the batter. Bake 35 to 40 minutes, or until toothpick comes out with a few crumbs, but not wet. Let cool in pan for 15 minutes and then lift onto wire rack to cool completely.
These brownies were pretty tasty, but they certainly were not my favorite. I'm a fudgey brownie kind of girl and these were definitely cakey. I would have liked to taste more coconut and I may add coconut extract the next time I make these. However, these are definitely better the next day as they get gooier. But who is that patient?
Good luck and happy baking!
Rosie
Source: Martha Stewart Cookies
Sunday, February 26, 2012
A Twist- Mint Oreo Truffles
I have to thank my friend Shae for coming up with this recipe. As a college student, there are not a lot of things one can afford to make when craving a homemade sweet. However, last year Shae decided to take a twist on the classically easy Oreo truffle-- using mint Oreos instead of regular. I have to say, the results were pretty phenomenal and I would make these all the time if I didn't think I'd have to be rolled to class every day.
After Christmas, I had a little bit of money on hand so I decided to get myself a gift. Partially because I really wanted it, and partially because I knew it was time for Oreo truffles. So I bought a food processor.
Isn't she beautiful? I've nicknamed her Matilda. I think my boyfriend was a bit disconcerted that I had chosen a pink food processor as he immediately connected what this would implicate for the rest of the kitchen appliances I may buy in my lifetime. Oh well, I think he'll get over it. I must say, this processor works like a charm. It may be small, but it gets the job done in no time.
What you need for mint Oreo truffles:
1 package mint Oreos
1 (8 oz) package of cream cheese, softened
1 (16 oz) bag semi-sweet chocolate chips
2 tablespoons shortening
1/2 (2 oz) Ghirardelli white chocolate baking bar
Crush up your Oreos. Don't crush them too fine or else the truffles will be too soft. You'll want the Oreos to still be a little chunky.
Using an electric mixer, combine the cream cheese and crushed Oreos until thoroughly incorporated. Place mixture, covered, in the freezer and chill for at least two hours.
Working quickly, roll the chilled mixture into one inch balls. Place in the refrigerator or freezer while preparing chocolate. Next, melt the chocolate chips and shortening in a double boiler over medium heat.
Using tongs or a toothpick, dip the balls in the chocolate until completely covered A warning-- as the truffles warm, they have a tendency to fall apart. Try to keep them in the fridge up until the very last second before it is time to dip them. Let the truffles cool and harden on wax paper.
Once the truffles have cooled, it is time to drizzle them with white chocolate. Melt the white chocolate in the microwave and pour into a ziploc bag. Snip the corner of the bag and then drizzle the truffles. Refrigerate truffles until ready to serve.
After Christmas, I had a little bit of money on hand so I decided to get myself a gift. Partially because I really wanted it, and partially because I knew it was time for Oreo truffles. So I bought a food processor.
Isn't she beautiful? I've nicknamed her Matilda. I think my boyfriend was a bit disconcerted that I had chosen a pink food processor as he immediately connected what this would implicate for the rest of the kitchen appliances I may buy in my lifetime. Oh well, I think he'll get over it. I must say, this processor works like a charm. It may be small, but it gets the job done in no time.
What you need for mint Oreo truffles:
1 package mint Oreos
1 (8 oz) package of cream cheese, softened
1 (16 oz) bag semi-sweet chocolate chips
2 tablespoons shortening
1/2 (2 oz) Ghirardelli white chocolate baking bar
Crush up your Oreos. Don't crush them too fine or else the truffles will be too soft. You'll want the Oreos to still be a little chunky.
Using an electric mixer, combine the cream cheese and crushed Oreos until thoroughly incorporated. Place mixture, covered, in the freezer and chill for at least two hours.
Working quickly, roll the chilled mixture into one inch balls. Place in the refrigerator or freezer while preparing chocolate. Next, melt the chocolate chips and shortening in a double boiler over medium heat.
Using tongs or a toothpick, dip the balls in the chocolate until completely covered A warning-- as the truffles warm, they have a tendency to fall apart. Try to keep them in the fridge up until the very last second before it is time to dip them. Let the truffles cool and harden on wax paper.
Once the truffles have cooled, it is time to drizzle them with white chocolate. Melt the white chocolate in the microwave and pour into a ziploc bag. Snip the corner of the bag and then drizzle the truffles. Refrigerate truffles until ready to serve.
These truffles are far too delicious! They're incredibly rich so don't try to overstuff yourself. However, the mint in these added a really delicate flavor overall.
If you are ever trying to express your sweetheart, this is definitely a recipe to try. It's incredibly simple, pretty inexpensive to make, and completely delicious.
Good luck and happy baking!
Rosie
Source: The beautiful Shae
Sunday, February 19, 2012
Martha Stewart's Chocolate-Pistachio Biscotti
I've never been a huge biscotti fan. I have only ever had that prepackaged kind you get from Starbucks and honestly, I just thought it tasted like cardboard. However, my dad bought me the Martha Stewart Cookies cookbook for Christmas and it has several different biscotti recipes so I decided to give biscotti a second chance.
Boy, am I glad that I did. This biscotti is like no biscotti I've ever tried. It's nice and crisp around the edges, but the center is still a bit soft and gooey. It's like a cookie and a brownie got together and had a baby. It's delicious.
What you need:
6 tablespoons unsalted butter
2 cups all purpose flour
1/2 cup unsweetened cocoa powder
1 teaspoon baking soda
1/4 teaspoon salt
1 cup sugar
2 large eggs
1 cup shelled pistachios, unsalted and not roasted
1/2 cup chocolate chips
Preheat your oven to 350 degrees. Line a baking sheet with parchment paper. In a medium bowl, whisk together flour, cocoa powder, baking soda, and salt.
In a large bowl, cream butter and sugar until light and fluffy. Add eggs; beat until well combined, scraping down sides of bowl as necessary.
Add flour mixture and stir to form a stiff dough. Stir in pistachios and chocolate chips.
Transfer dough to prepared baking sheet. Form into slightly flattened log, about 12 by 4 inches. Bake until slightly firm, about 25 minutes. Cool about 5 minutes. Reduce oven to 300.
On a cutting board, using a sharp serrated knife, cut biscotti diagonally into 1 inch thick slices. Arrange biscotti, cut sides down, on baking sheet and bake until crisp but still slightly soft in the center, about 8 minutes.
This biscotti was soooo good. My family ate it with coffee, milk and even ice cream!
Good luck and happy baking!
Rosie
Source: Martha Stewart Cookies
Boy, am I glad that I did. This biscotti is like no biscotti I've ever tried. It's nice and crisp around the edges, but the center is still a bit soft and gooey. It's like a cookie and a brownie got together and had a baby. It's delicious.
What you need:
6 tablespoons unsalted butter
2 cups all purpose flour
1/2 cup unsweetened cocoa powder
1 teaspoon baking soda
1/4 teaspoon salt
1 cup sugar
2 large eggs
1 cup shelled pistachios, unsalted and not roasted
1/2 cup chocolate chips
Preheat your oven to 350 degrees. Line a baking sheet with parchment paper. In a medium bowl, whisk together flour, cocoa powder, baking soda, and salt.
In a large bowl, cream butter and sugar until light and fluffy. Add eggs; beat until well combined, scraping down sides of bowl as necessary.
Add flour mixture and stir to form a stiff dough. Stir in pistachios and chocolate chips.
Transfer dough to prepared baking sheet. Form into slightly flattened log, about 12 by 4 inches. Bake until slightly firm, about 25 minutes. Cool about 5 minutes. Reduce oven to 300.
On a cutting board, using a sharp serrated knife, cut biscotti diagonally into 1 inch thick slices. Arrange biscotti, cut sides down, on baking sheet and bake until crisp but still slightly soft in the center, about 8 minutes.
This biscotti was soooo good. My family ate it with coffee, milk and even ice cream!
Good luck and happy baking!
Rosie
Source: Martha Stewart Cookies
Sunday, February 12, 2012
Valentines Day Cookies and Cream Cake
Valentines Day is just two days away. I don't know about you guys, but I'm a pretty terrible Valentine. I bought Austin's gift, but I'm determined to be crafty and make him something super wonderful. I just haven't found the time. Since we live in completely different time zones, I'm afraid that there's no way he's going to get his gift on time. Sorry, babe. Just call me your very belated Valentine.
Last year, I had basically no money so I decided to bake cookies and mail them to Austin. Little did I know, I ended up baking 10 pounds of cookies. Austin forbid me to do that this year so I had to make him a sweet Valentines treat a bit early this year. I technically made this cake in January but... Let's just pretend I made it yesterday, mmkay?
This is probably the best cake ever. I'm not exaggerating. However, this has also been one of the most difficult cakes I've ever made in my life. In fact, it has taken me three attempts to get the cake to come out of the pan in one piece. On the first try I had a pile of cake pieces. Delicious, rich, moist cake pieces but cake pieces nonetheless. The secret is in the parchment paper. But more on that later.
What you need...
For the cake:
1 3/4 cup flour
2/3 cup Dutch process cocoa powder
1 1/2 teaspoons baking soda
1/2 teaspoon baking powder
1/2 teaspoon salt
3/4 cup (1 1/2 sticks) unsalted butter, softened
1 1/2 cups granulated sugar
1 teaspoon vanilla extract
3 large eggs at room temp
1 1/4 cup buttermilk
For the filling:
4 oz cream cheese, softened
1/2 cup (1 stick) unsalted butter, softened
1 box (16 oz) confectioners sugar
3 to 4 tablespoons milk
For the frosting:
1 1/2 cups heavy cream
1/4 cup granulated sugar
1 teaspoon vanilla extract
3 cups crushed Oreos
Preheat over to 350 degrees. Grease two 8 or 9 inch round cake pans. Line the bottoms with parchment paper. This prevents them from becoming a sticky, crumbly mess. Grease the parchment and flour both pans. Set aside. In a medium sized bowl, stir together flour, cocoa powder, baking soda, baking powder and salt until well blended. Set aside.
In a large bowl, beat butter, sugar, and vanilla on medium speed for 3 minutes or until light and fluffy. Add eggs, one at a time, beating well after each addition.
On low speed, beat the flour mixture into butter mixture in three additions, alternating with buttermilk, beginning and ending with flour mixture; beat one minute.
Divide batter evenly between the prepared pans. Bake for about 36 minutes or until toothpick inserted near center comes out clean. Cool cakes in pans for 10 minutes before removing from pans and transferring to wire racks. Cool completely. These cakes are very delicate so be very gentle with them.
Now for the filling. In a large bowl, mix cream cheese and butter on medium speed until smooth. Gradually add confectioners sugar, then milk. Beat about 2 minutes or until light and fluffy. Divide the cake layers in half horizontally by using a serrated knife. Set first layer on stand or cake ring. Spread 1/3 of filling and then top with second layer. Repeat until you top with the final cake layer, cut side down.
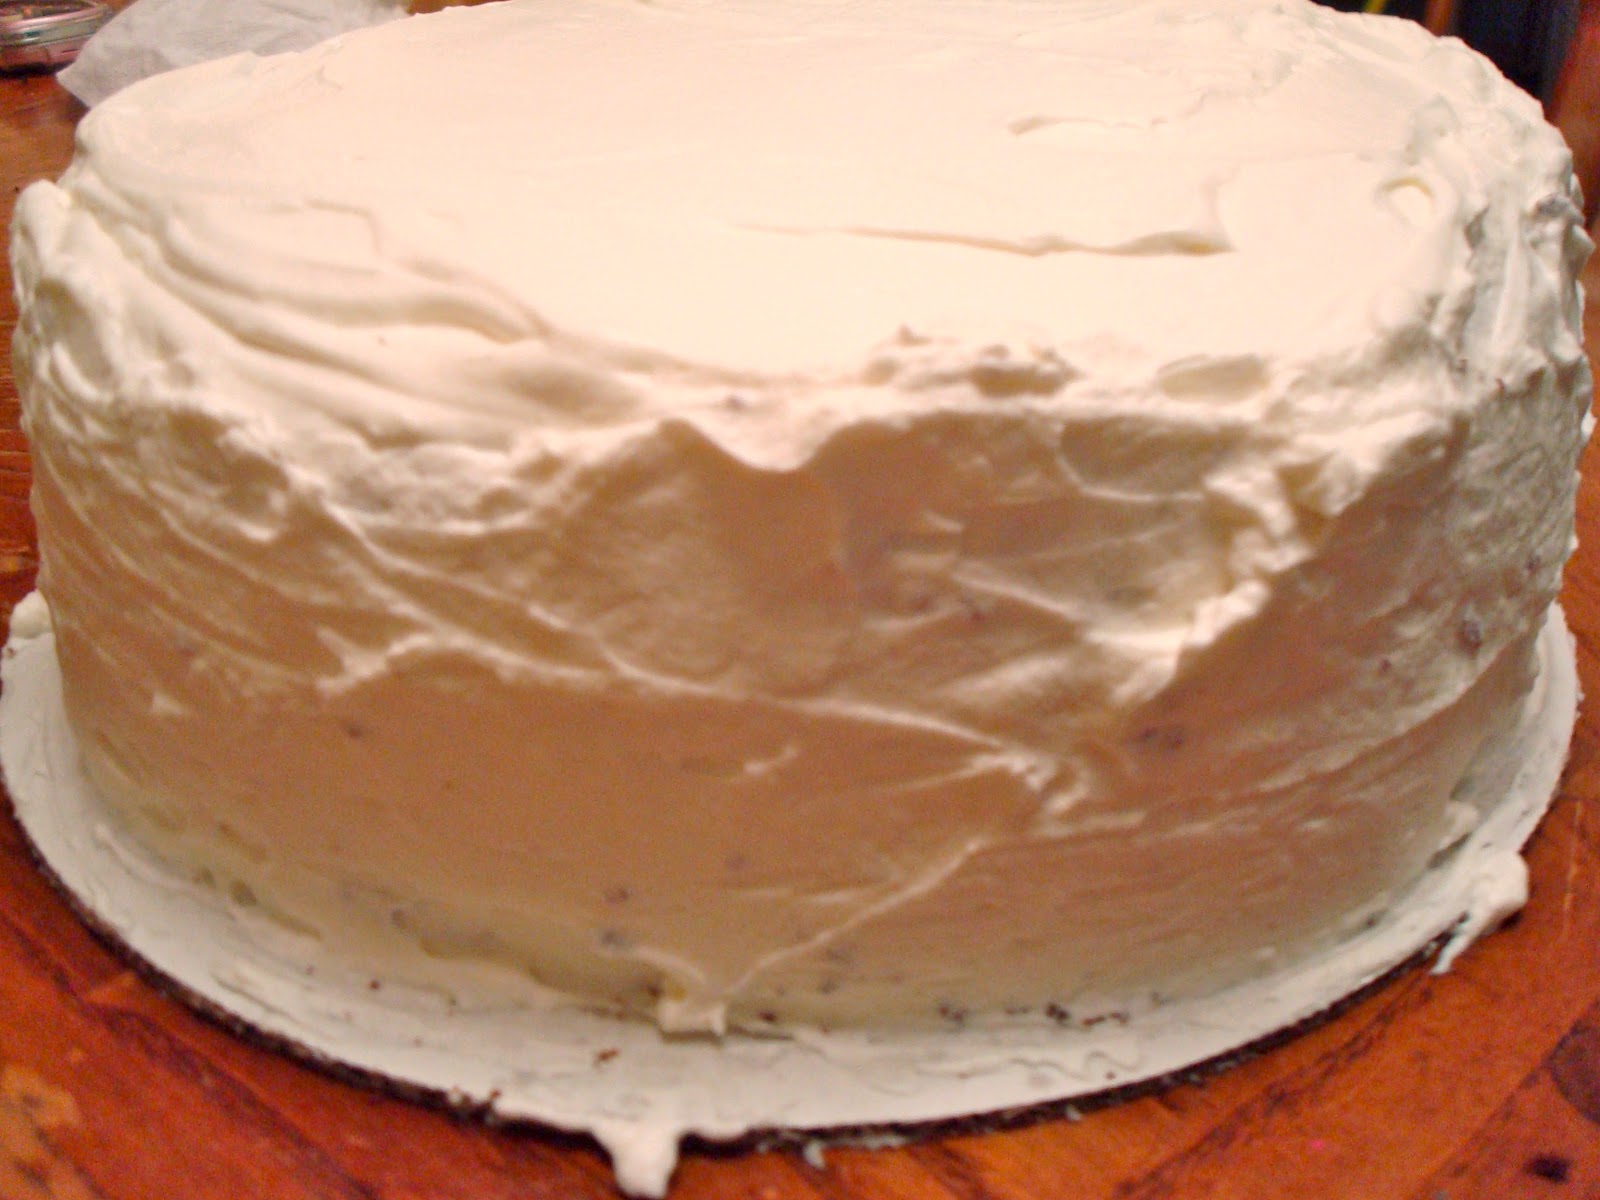
Frosting time! In a large bowl, with mixer on high, beat heavy cream, sugar and vanilla until soft peaks form. Generously spread the whip cream all over the cake. Try to avoid getting crumbs on the top. However, if some get on the sides, the oreos will cover them up. Put your crushed cookies in a bowl. With cupped hands, gently press the crumbs into the side of the cake. Brush off excess before serving. Keep refrigerated.
Voila! This cake looks like a million bucks and tastes even better. If you're trying to impress your Valentine, this is the cake to use!
Good luck and happy Valentines!
Rosie
Source: Family Circle
Last year, I had basically no money so I decided to bake cookies and mail them to Austin. Little did I know, I ended up baking 10 pounds of cookies. Austin forbid me to do that this year so I had to make him a sweet Valentines treat a bit early this year. I technically made this cake in January but... Let's just pretend I made it yesterday, mmkay?
This is probably the best cake ever. I'm not exaggerating. However, this has also been one of the most difficult cakes I've ever made in my life. In fact, it has taken me three attempts to get the cake to come out of the pan in one piece. On the first try I had a pile of cake pieces. Delicious, rich, moist cake pieces but cake pieces nonetheless. The secret is in the parchment paper. But more on that later.
What you need...
For the cake:
1 3/4 cup flour
2/3 cup Dutch process cocoa powder
1 1/2 teaspoons baking soda
1/2 teaspoon baking powder
1/2 teaspoon salt
3/4 cup (1 1/2 sticks) unsalted butter, softened
1 1/2 cups granulated sugar
1 teaspoon vanilla extract
3 large eggs at room temp
1 1/4 cup buttermilk
For the filling:
4 oz cream cheese, softened
1/2 cup (1 stick) unsalted butter, softened
1 box (16 oz) confectioners sugar
3 to 4 tablespoons milk
For the frosting:
1 1/2 cups heavy cream
1/4 cup granulated sugar
1 teaspoon vanilla extract
3 cups crushed Oreos
Preheat over to 350 degrees. Grease two 8 or 9 inch round cake pans. Line the bottoms with parchment paper. This prevents them from becoming a sticky, crumbly mess. Grease the parchment and flour both pans. Set aside. In a medium sized bowl, stir together flour, cocoa powder, baking soda, baking powder and salt until well blended. Set aside.
In a large bowl, beat butter, sugar, and vanilla on medium speed for 3 minutes or until light and fluffy. Add eggs, one at a time, beating well after each addition.
On low speed, beat the flour mixture into butter mixture in three additions, alternating with buttermilk, beginning and ending with flour mixture; beat one minute.
Divide batter evenly between the prepared pans. Bake for about 36 minutes or until toothpick inserted near center comes out clean. Cool cakes in pans for 10 minutes before removing from pans and transferring to wire racks. Cool completely. These cakes are very delicate so be very gentle with them.
Now for the filling. In a large bowl, mix cream cheese and butter on medium speed until smooth. Gradually add confectioners sugar, then milk. Beat about 2 minutes or until light and fluffy. Divide the cake layers in half horizontally by using a serrated knife. Set first layer on stand or cake ring. Spread 1/3 of filling and then top with second layer. Repeat until you top with the final cake layer, cut side down.
Frosting time! In a large bowl, with mixer on high, beat heavy cream, sugar and vanilla until soft peaks form. Generously spread the whip cream all over the cake. Try to avoid getting crumbs on the top. However, if some get on the sides, the oreos will cover them up. Put your crushed cookies in a bowl. With cupped hands, gently press the crumbs into the side of the cake. Brush off excess before serving. Keep refrigerated.
Voila! This cake looks like a million bucks and tastes even better. If you're trying to impress your Valentine, this is the cake to use!
Good luck and happy Valentines!
Rosie
Source: Family Circle
Subscribe to:
Posts (Atom)